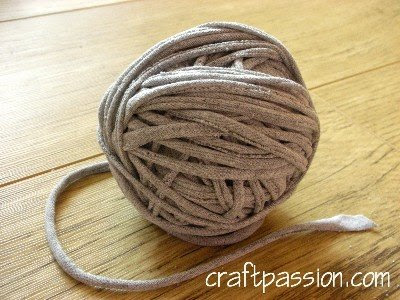
 Another tutorial to help save our Mother Earth by turning unwanted items into something useful. This is the yarn ball I made out of an old T-shirt which I have been wearing for 10 years day-in day-out, wash-in wash-out. It finally broke down and tore at the collar and sleeves. Waste not, want not, I decided to recycle it.
In this tutorial, you will need:
1. T-shirt (those without side-seam)
2. A pair of sharp scissors
Place the T-shirt flat on the floor or working table.
 We only need the bottom-halve portion of the T-shirt. Cut horizontally from sleeve to sleeve as shown above. Cut away the end border of the T-shirt too. This useful" portion must be plain and free from printing, embroidery and any joints or seams. Any motifs will be too hard for the T-shirt to turn into tubular yarn.
 Fold the T-shirt from side to side, leaving an inch allowance as shown.
 Cut into strips as shown, remember not to cut the 1 inch allowance. Leave it there as we are going to use this to form a continuous strip.
The width of the strip will determine the thickness of your yarn, but the minimum is 15mm, anything less than this, the process will fail. The width shown here is 15mm.
 Finish cutting the T-shirt from top to bottom evenly.
 Unfold the 1 inch allowance and it will look as shown below.
 The next process is to make a slant cut from strip 1 to strip 2, strip 2 to strip 3 and so on in order to create a continuous strip for the whole T-shirt.
 I purposely leave the first strip uncut until I have finished all. No catch, just my preference to show you better how the slanting looks like.
 Now, I have a loooooooong strip of continuous T-shirt yarn waiting for the next process.
 Next is to turn the strip into a tubular yarn. All you need to do is tug the strip as shown below. Rememeber I told you that the minimum width of the strip is 15mm? The secret is.... if you have anything narrower than this, it will break once you pull.
 See, the strip will curl and form a tubular shape after the tug. This process will lengthen the yarn too, which is good, so you have more yarn to work on your project.

....tug....
....tug....
....tug....
The strip has now turned into tubular yarn, from Fettuccine to Spaghetti ***wink***. You can roll your yarn into ball and it is ready for your next project.

HAPPY YARNING!!!
A preview of what is coming up next!!!!

Continue Reading...


 The crochet hook is stuck on my hands. I crocheted this cute owl and made it into a key chain. This craft/art is called Amigurumi, which is the Japanese art of knitting or crocheting stuffed animals or other creatures. Again, to be friendly to Mother Earth, I used my left over yarns since this tiny creature doesn't require lots of yarn. This is the first one I made by
  It is quite easy to follow but I found that the instructions aren't very complete. A novice Amigurumi practitioner like me had lots of question marks floating around my head at certain steps like the placement of the eyes, the nose, the wings and the feet. Since I experimented with it, I am able to give more detailed instruction. I made 2 of them to compare and I am going to tell you where the ideal location is :)
  This is the second one I made after testing out the first one. Both of them look a bit different and it is because of the difference in those positionings I mentioned above.
